Explore This Issue
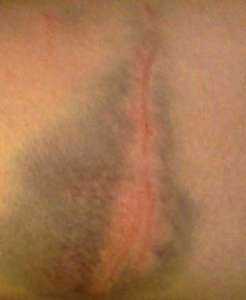
ACEP Now: Vol 36 – No 02 – February 2017Figure 1 (Left): Suboptimal quality photograph of an injury from a domestic violence assault.
The Case: You are called to testify in court for a domestic violence assault case. You saw the patient three years ago; she had sustained multiple bodily injuries. In addition to providing medical care, you took photographs of her injuries. While on the stand, you are shown the picture in Figure 1 and are asked to describe the location and size of the wound. How would you answer that question?
Discussion
In the case, the photograph does not allow the viewer to accurately know which body part is being depicted. Also, the size cannot be described. Photography has become an important documentation tool for injuries. It is used in documenting child abuse, elder abuse, domestic violence, sexual violence, and assault cases. In some departments, forensic nurse examiners (FNEs) are called upon to take photographs and document the findings. However, a FNE may not always be available, requiring the emergency provider to take the pictures. A few helpful hints will allow you to take photographs that actually represent the finding you identified.
Forensic photography supplements the medical forensic history and physical findings. It allows the viewer to see the injuries that the provider saw at the time of evaluation. The advent of digital photography has had a great impact on forensic photography. Several advantages of digital image capture include instant review of photo for quality and composition, no need for film or film development, and ease of storing and transfer of images. Prior to taking photos, there should be a department policy addressing the use of photographs. The policy should cover topics including consent, secure storage of images, and transfer of images. Risk management, information technology, and the medical records departments should be involved in policy development.
Patients should consent to have their photographs taken. A separate photographic consent form should be used. Patient have the right to refuse image capture of certain injuries or body parts. Also, the consent should address the release of images to law enforcement and/or district attorney’s offices. Images should be stored on a secure server and/or within the electronic health record.
The medical record should reflect that photographs were taken as well as the number taken and how they were stored. Transferring the images to a CD-ROM and storing the CD with the medical record or in a separate secure location or using a separate memory card for each patient are acceptable. Photographs depicting genitalia should be stored with particular sensitivity.
Some Photographic Tips
Equipment: Expensive equipment is not necessary. A good-quality point-and-shoot camera takes sufficient images. The camera should capture images of at least six megapixels and have macro lens capabilities. Macro lenses allow close-up shots and are represented by the “tulip” icon on most cameras. A built-in or separate flash is also required. Other essentials include spare batteries, media cards, computer cable, reference scales for measuring length, cleaning supplies, and the camera manual. A tripod or monopod may also be helpful.
For most applications, the camera can be kept in automatic mode, which will choose the correct settings and capture desirable images. For close-ups, the mode dial should be set to the macro setting. For initial settings, file format should be set to JPEG, image quality to fine, and image size to largest.
Prior to taking photographs, a picture of the patient’s identifying information should be taken. This should include the patient name, medical record number, date, and time. A hospital ID sticker is ideal. Next, a picture of the photographer’s ID should be taken.
A facial image or full-body image can be taken to identify the patient. When taking pictures of an injury or other finding, a “forensic series” of images should be taken:
- Overview (includes two anatomic landmarks for orientation)
- Mid-range (closer, includes one anatomic landmark)
- Close-up (one with and one without a reference scale)
The overview and mid-range shots may include more than one finding. However, the close-ups should each include a single injury.
A reference scale should always be used. The most popularly used scale is the American Board of Forensic Odontology scale (ABFO-2). This has the advantage of showing the distortion of the photograph. If an ABFO scale is not available, a small ruler or coin can be used. The scale should not obscure the finding(s) and should be positioned on the same plane as the finding and at an equal distance from the camera.
Make sure your camera is oriented 90 degrees to the injury. This ensures the most accurate representation of the injury. Also, make sure the background is free of clutter.
Take as many pictures as needed to best represent the finding. Never delete a picture no matter how bad it is. Also, photographs should not be manipulated, and if photographic software is used to enhance an image, the original image should be saved, and for each altered image, documentation of how it was altered should be provided.
Pages: 1 2 | Multi-Page


No Responses to “Tips for Taking Forensic Photographic Evidence in the Emergency Department”