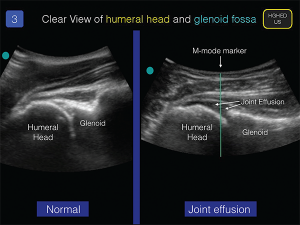
Figure 3. Using the same technique detailed in Figure 2, examine the affected glenohumeral joint.
ACEP Now: December 2025 (Digital)
Read More
View this author's posts »
No Responses to “Figure 3. Using the same technique detailed in Figure 2, examine the affected glenohumeral joint.”
Your email address will not be published. Required fields are marked *
Δ


No Responses to “Figure 3. Using the same technique detailed in Figure 2, examine the affected glenohumeral joint.”