Tips for Using a Hyperangulated Video Laryngoscope

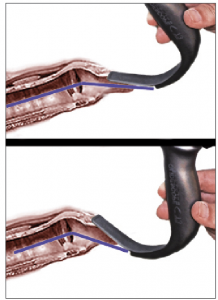
Figure 2 (Right). Schematic representation of the angle of approach. The top image shows ideal placement of a hyperangulated blade—in this case, a GlideScope Titanium blade—compared to overinsertion (bottom image). Note that the approach angle is more acute and that there is less room for tube delivery between the blade and the larynx.
The second piece of the puzzle with a hyperangulated video blade is getting the tube to drop into the trachea. One cannot merely advance the stylet, as the curvature used to get around the tongue creates a side-to-side dimension that exceeds the diameter of the human trachea. The trachea is only 15–20 mm in males and 14–16 mm in females. Additionally, if the hyperangulated stylet is simply rotated upward through the cords, the direction the tube and stylet points is upward, while the trachea has a downward inclination. Finally, there are the tracheal rings, which can prevent tube advancement when using a standard asymmetric left-beveled tracheal tube.
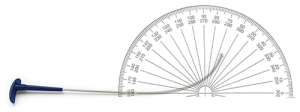
Verathon offers the GlideRite stylet to help with tube insertion. It is a rigid stylet with a 70-degree angle and a nifty proximal end, allowing the thumb to pop the stylet up (see Figure 3). A GlideRite stylet exceeds 2 inches in side-to-side dimension; this exceeds the dimensions of the human trachea. Accordingly, it is a tube delivery device (around the tongue and into the larynx), not a tracheal introducer. By partially removing the stylet after insertion through the cords, the tracheal tube can be advanced downward into the trachea. This maneuver, however, doesn’t address issues with the inclination of the trachea and the corrugation of the tracheal rings.

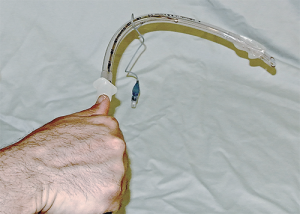
Figure 4. Right-turn overhand technique for hyperangulated stylet insertion into the trachea. By turning the stylet and tube 90 degrees, the tube angles downward, aligning with the inclination of the trachea. Note that the tube can be advanced in small increments off the stylet using the right hand only as long as an overhand grip is used at the top of the tube and stylet.

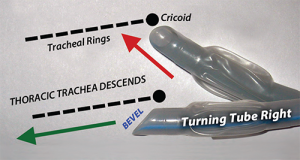
Figure 5. Turning the tube right improves interaction with trachea rings (corrugation and inclination) with a left-bevel tube. Whenever inserting trachea tubes with a left-bevel tube, if resistance is felt beneath the vocal cords, a gentle rightward turn will solve the problem in most instances.
Pages: 1 2 3 | Single Page
Topics: Airway ManagementCritical CareEmergency DepartmentEmergency PhysicianImaging and UltrasoundKovacs' SignLaryngoscopePractice ManagementProcedures and Skills
Related
-
Can This Patient Leave Against Medical Advice?
March 10, 2025 - 0 Comment -
Emergency Physicians of the Sandwich Generation Face Unique Challenges
March 10, 2025 - 0 Comment -
Texas Hospitals Now Must Ask About Immigration Status
March 10, 2025 - 0 Comment
Current Issue
About the Author

Richard M. Levitan, MD, FACEP
Richard M. Levitan, MD, FACEP, is an adjunct professor of emergency medicine at Dartmouth’s Geisel School of Medicine in Hanover, N.H., and a visiting professor of emergency medicine at the University of Maryland in Baltimore. He works clinically at a critical care access hospital in rural New Hampshire and teaches cadaveric and fiber-optic airway courses.


2 Responses to “Tips for Using a Hyperangulated Video Laryngoscope”
January 10, 2016
Heston LaMar, MDThe proper use of the proximal end of the GlideRite stylet in terms of the “thumb pop” & also using it to steer the distal end of the tube is something that I think very few are taught or know (unless they have gone to a good recent airway course). Depth & angle are also key as you point out (which is why I hardly ever use a 4 blade on our GlideScope).
January 10, 2016
ML ClevelandCan you include a link to a video representation of using the overhand technique with the 90° rotation?